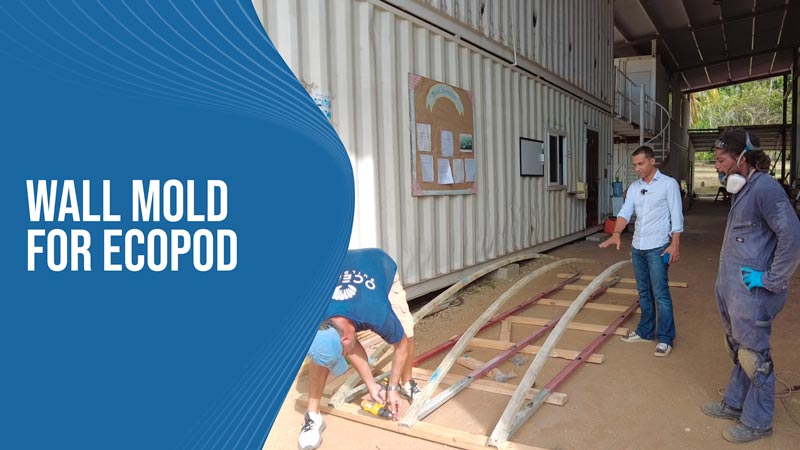
We are back at the factory with an update about some of the EcoPod molds. What you can see in the video below are basically the “bones” of the eventual mold for some of the EcoPod wall sections. This backbone structure will be used to support the molds and give them their shape.
The next steps for this section will be to apply a layer of laminate which will give it a solid surface. We will then apply a layer of tooling gel coat on top of the laminate to give us a working surface. The tooling gel coat layer will be super durable so that the mold won’t be damaged during the process of applying the layers of fiberglass and resin and then removing them once everything is cured.
The individual wall pieces will be 4’x7’ and this mold is 4’x14’ so we can use one mold to make two smaller sections at a time. These wall pieces will be stacked on top of each other to reach the final height of the wall. By using a curved mold like this, we can ensure that each section has an identical radius so the circular shape of the EcoPod will be as exact as we can make it.
Using smaller 4’x7’ sections allows us to put the pieces together like a puzzle to achieve the height and lengths that we need and will also make it easier to work around the areas that will have windows. The EcoPod will also have a double-walled design that will have two one-inch thick walls with a layer of foam between them to help with insulation and soundproofing.
We are excited to move forward and continue making steps toward first getting an EcoPod prototype on the water and later putting the EcoPod into full production so be sure to follow along in our blog for more EcoPod updates and we hope you are as excited as we are.


